
Sunday, July 28, 2013
Friday, July 26, 2013
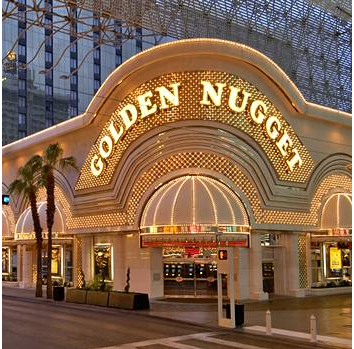
Golden Nugget, Las Vegas Birthday Celebration!
Ms. J. celebrated her birthday at the Golden Nugget Casino in downtown Las Vegas. To my surprise, I had a fun and relaxting time. Back in the day, my Family's favorite casinos were downtown. I remember the Golden Nugget and Lady Luck casinos... smokey, free drinks, and 25 cents paying, slot machines. To my surprise, I had a fun and relaxing time!
* Ms. J reserved a cabana on the 3rd level of the pool area. It was a private room setting with a television, refrigerator, celing fan, personal fan, furnished beautifully and private drapes. Ahhh...kick back with your favorite beverage!
*The water slide through the shark tank! OMG!
*The night club- you would want to be there!
*The ambiance - loved it!
*The staff, personable, kind and helpful!
Below "are a few photos":


 |
| adult pool, open til 2:00 am! |

Have a great weekend, be kind!
Wednesday, July 24, 2013
Quick and Easy DIY Wall Art!
To make quick, last minute artwork for Ms. C's bare bathroom wall, I used shelf paper from another project ($1.99 a roll) and three frames I already had. Two of the frames didn't have glass and I removed the glass from the new frame (99 Cents Store) to match. I gave all three a coat of black paint. Ms. C loved them - just in time for her party the next day!

 |
| Shelf paper from a dollar store |


This project would work well using wall paper, napkins or fabric. Centering your materials in glass frames and creating a border around them is another way to display your artwork. You could use different size frames (like above) or have them all the same size and color. It's up to you. Using an odd number of frames is best.
Have fun!
Friday, July 19, 2013
DIY Baby Shower Decorations
Here are a few more deocrating ideas for your baby shower.
Ms. E created beautiful center pieces using dollar store flower pots, fresh Gyp flowers (Gypsophila) dyed green and blue, and a little greenery. Two larger flower arrangements were made for the Mommy-to-be's table and the food buffet table. We picked up the flowers the morning of the baby shower from the flower district.


"It's A Boy" styrofoam letters were painted baby blue and glitter was added to the the comma for a little extra pizazz!


Below "are a few photos" from the baby shower:
 |
| My Niece, Ms. E, made this diaper train and diaper baby! Diaper boxes were used for the body of the train, notice the baby food jars for the wheels :) |
 |
| So cute and creative! |
 |
| Gifts for guests. Gift basket was wrapped in tulle for a refreshing change from celeophane. |
 |
| Gag gifts wrapped beautifully by Ms N. "You do not want what's inside these boxes" :) |
The shower was a beautiful success. The Mommy-to-be and her Mother-in-law planned and made purchases for the baby shower early. This helps financially when you're hosting an event.
* Cheese, nuts and fruit trays were purchased from the local supermarket.
* Fresh, handmade to order taco bar.
* Sangria only was served. No open bar.
* Family members made chocolate covered strawberries and fruit trays.
* Family member's, Ms. N, wrapped the gifts and Ms. E made the flower
arrangements.
* Great Grandmother, Ms. O, made the white tablecloths.
* Tent, chairs and tables were rented.
* Cupcakes were served instead of cake.
* Mr. D made sure the backyard was ready.
I hope these pictures and information are an inspiration to you when planning your baby shower. Have a great weekend and... be kind!
Wednesday, July 17, 2013
DIY Baby Boy Candy Bar Buffet
Candy bar buffets are a unique and personal way to bring an extra element of color and beauty to your baby shower.
Below are "a few photos" and how to instructions for making some of the items on this table.
 |
| Baby shower colors were blue and green |


We were on the lookout for the glass containers months before the shower. Most were purchased on sale for very reasonable prices. The candy was purchased from Jack's Wholesale Candy & Toy Company, 1244 East 8th Street, Los Angeles. Small sheer bags were used to hold the candy.
I made a green and white pokadot tablecloth for the candy bar and a blue pokadot tablecloth for the desert table.
Green pokadot was also used to make the candy tree that "It's A Boy" is leaning on.


To make this round styrofoam ball fit on top of the candle holder's flat surface, I made a ruffle (reminds me of a clown's ruffle collar). *Measured around the top (12") and doubled the length (24"). *Cut the ruffle on the fold. *On the sewing machine I stitched a 1/4" basting stitch. *Gathered the basting stitch until the fabric fit on top of the candle holder. *Tucked in the raw edges. *Once I was pleased with the way the collar looked, I used hot glue to glue it to the top of the candle holder. *Next, hot glue the styrofoam ball to the top of the collar. That's it! Insert the candy suckers of your choice.
I'll share more DIY projects from this baby shower in the next post. Remember to be kind.
photos: by eve
Subscribe to:
Posts (Atom)